Registering Live Platform Operation Center Application
You must register the Live Platform Operation Center Application for Multitenancy setup. You create a main registration that manages login authentication for all System Administrator user accounts that wish to access the Live Platform Operation Center in the Multitenancy deployment.
|
1.
|
Login to Azure portal as Global Administrator. |
|
2.
|
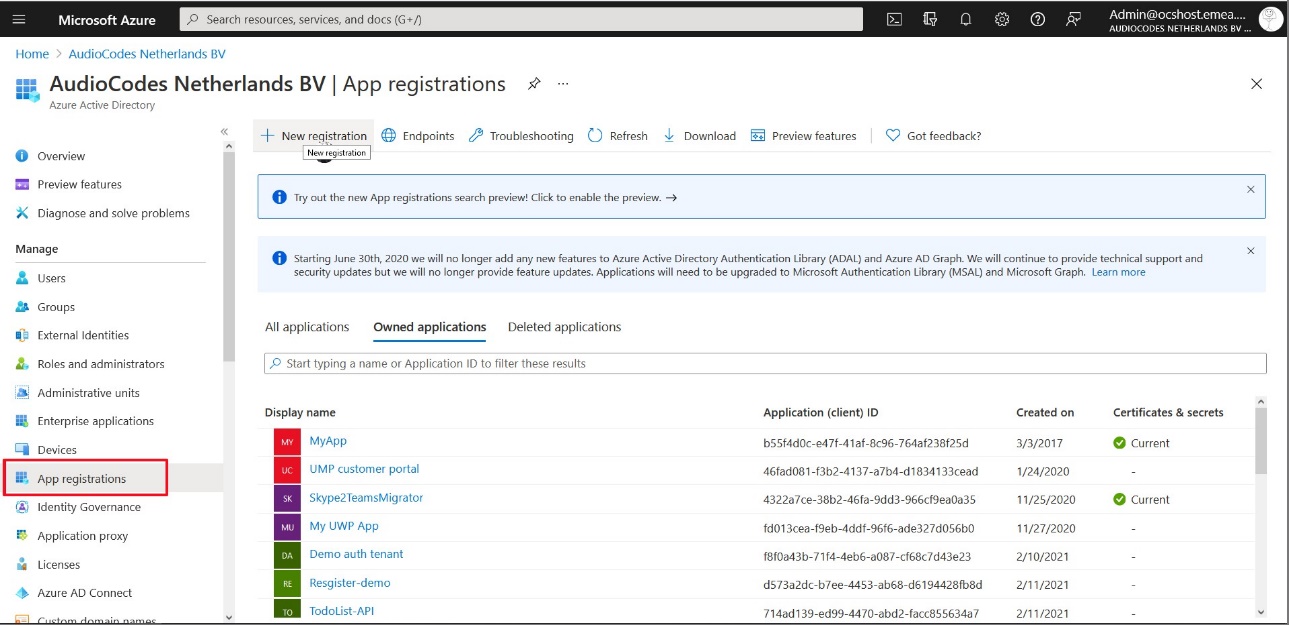
In the Navigation pane, select App registrations and then click New registration. |
|
3.
|
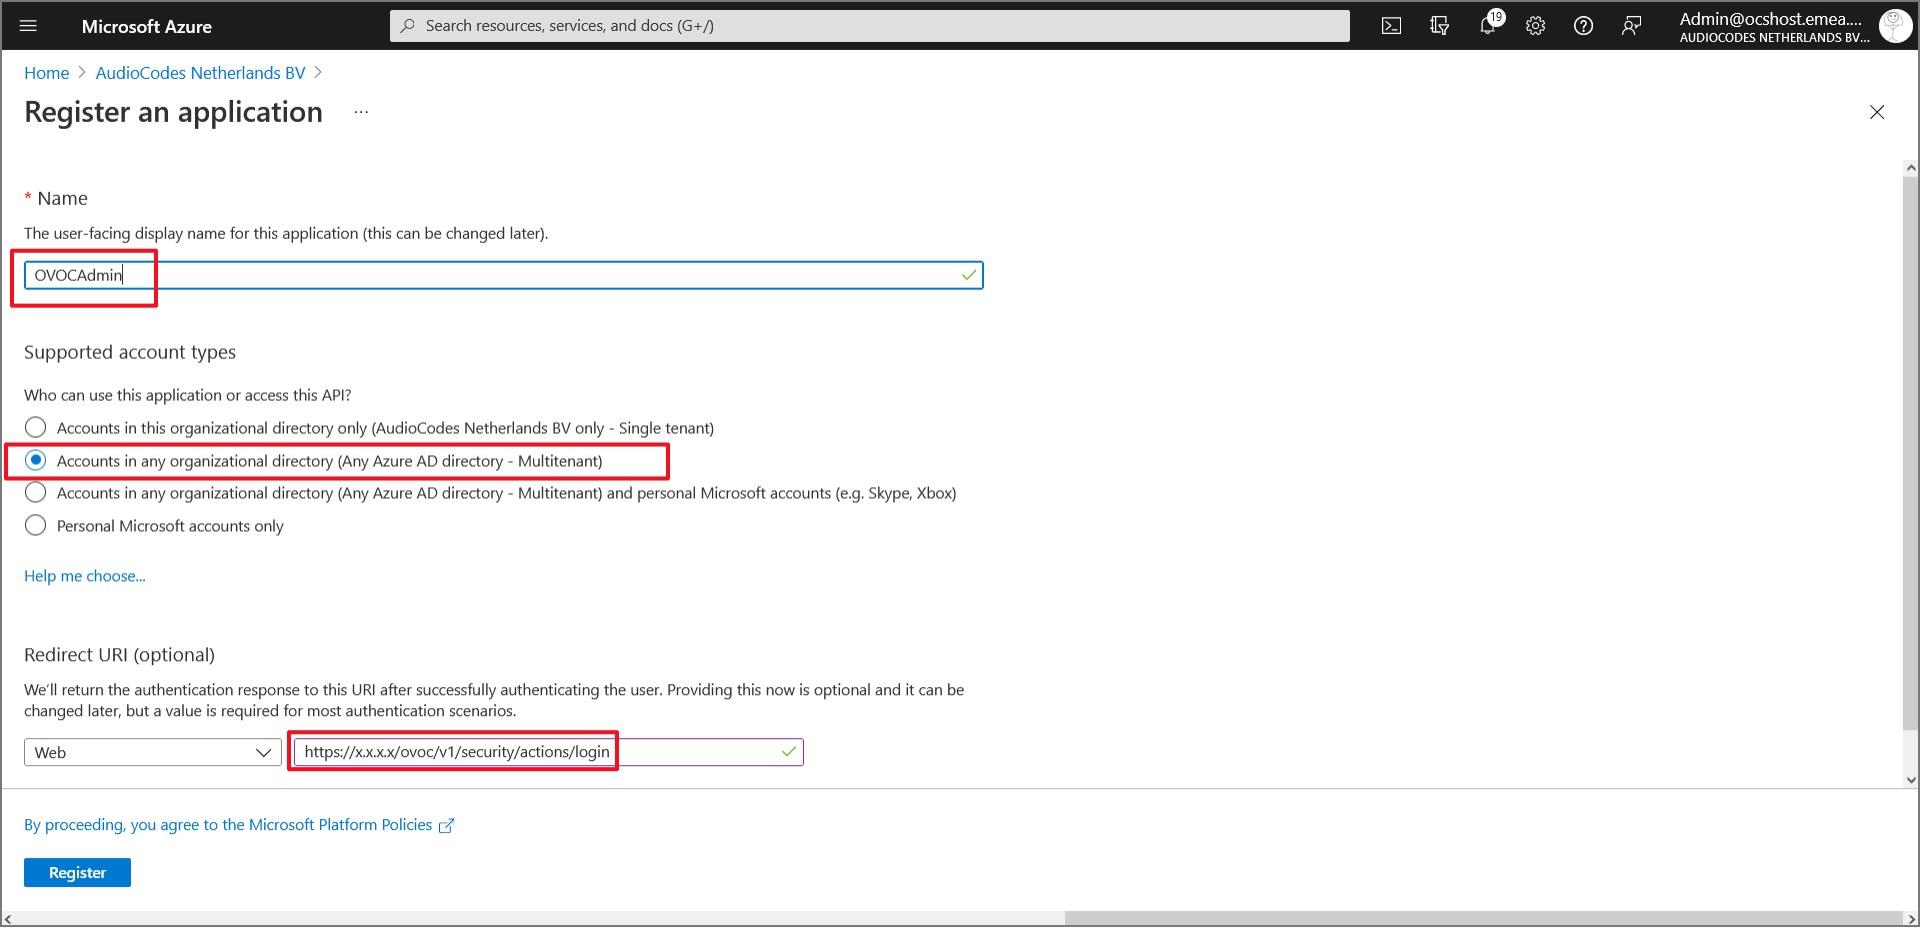
Enter the name of the OVOC registration tenant. |
|
4.
|
Under Implicit grant and hybrid flows, select Accounts in any organizational directory (Any Azure AD Directory- Multitenant) |
|
5.
|
Under Redirect URI, add the Redirect URI for the Live Platform server instance. |
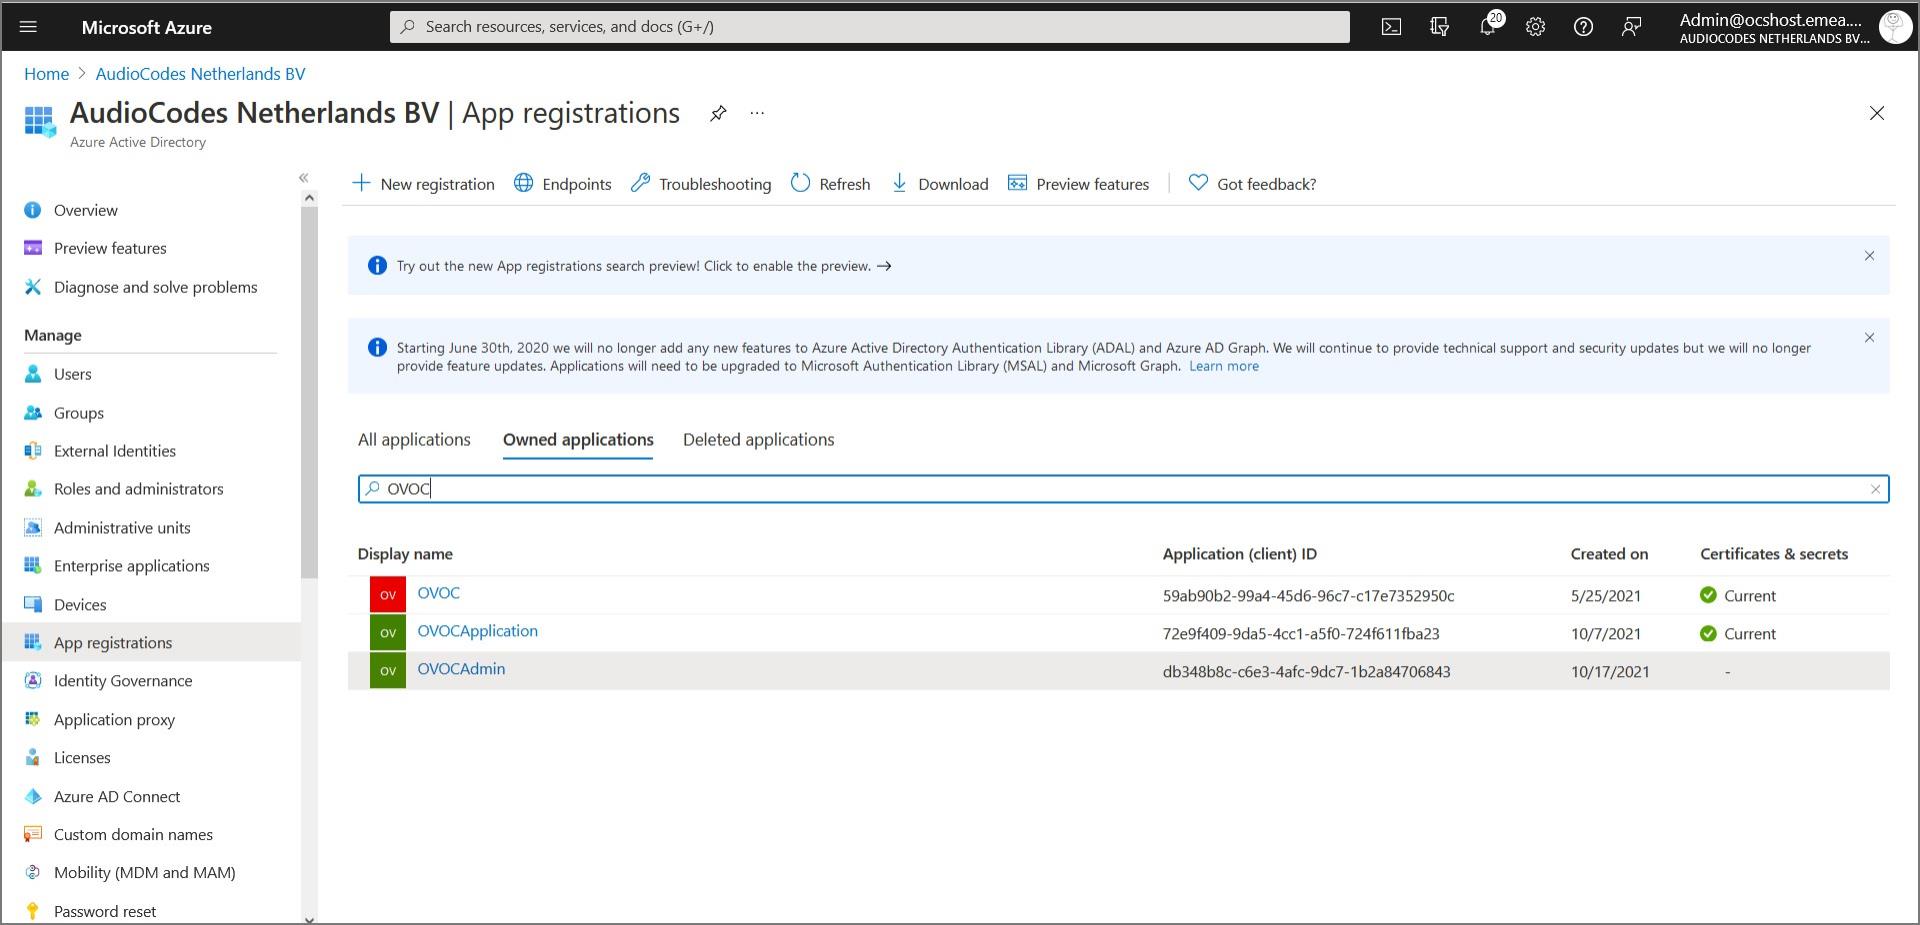
The newly registered application is displayed.
|
7.
|
Double-click the new application i.e. OVOCAdmin (in this example) to configure it. |
|
8.
|
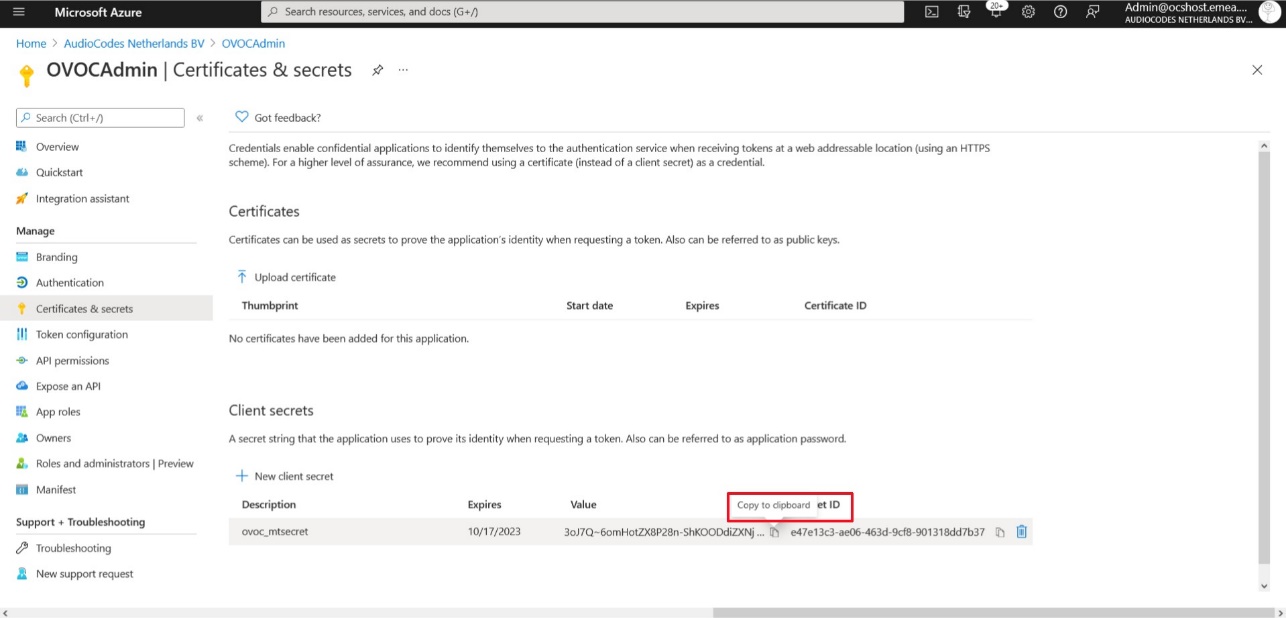
In the Navigation pane, select Certificates & secrets. |
|
9.
|
Click New client secret. |
|
10.
|
Enter a description and from the drop-down list select 24 months. |
|
12.
|
Copy the secret Value to clipboard as its required in later configuration and cannot be retrieved once you leave this screen. |
|
13.
|
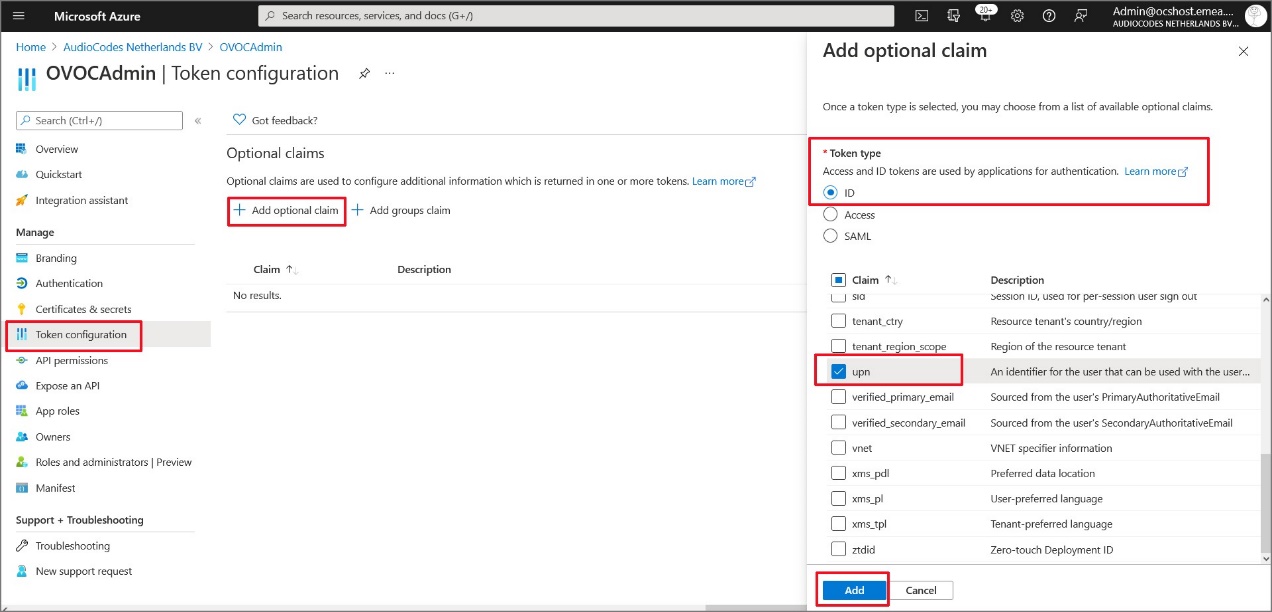
In the Navigation pane, select Token configuration. |
|
14.
|
Click Add optional claim, choose ID type, upn optional claim, and then click Add to confirm. |
|
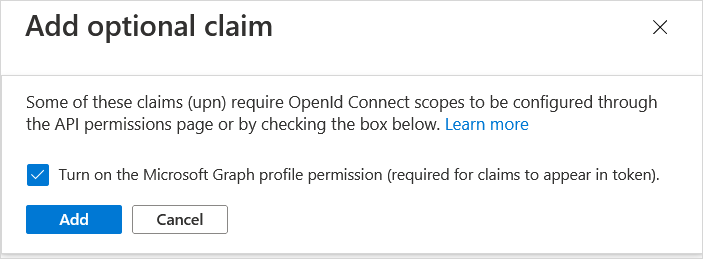
15.
|
Select the Turn on the Microsoft Graph profile permission check box and then click Add. This adds the Profile permission to the API permissions list. |
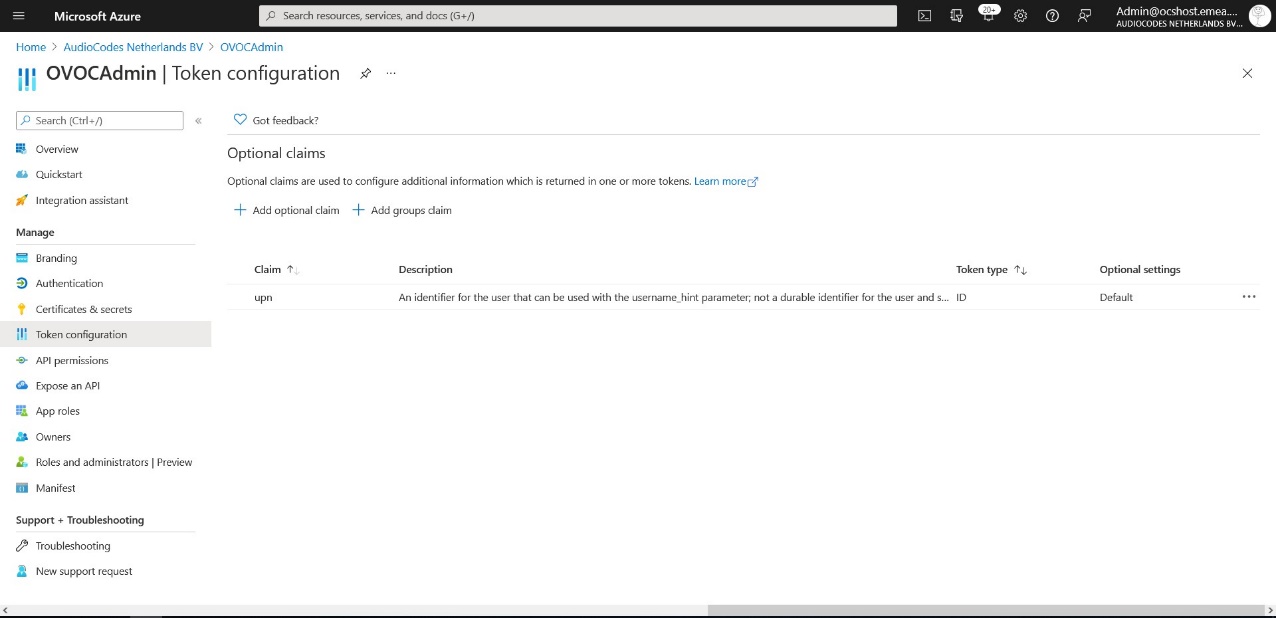
This configuration assumes that all operators have been added to the Active Directory in UPN format e.g. Johnb@firm.com. If operators have been added in email format e.g. John.Brown@firm.com then they will not be able to connect to OVOC in the multitenancy setup.
|
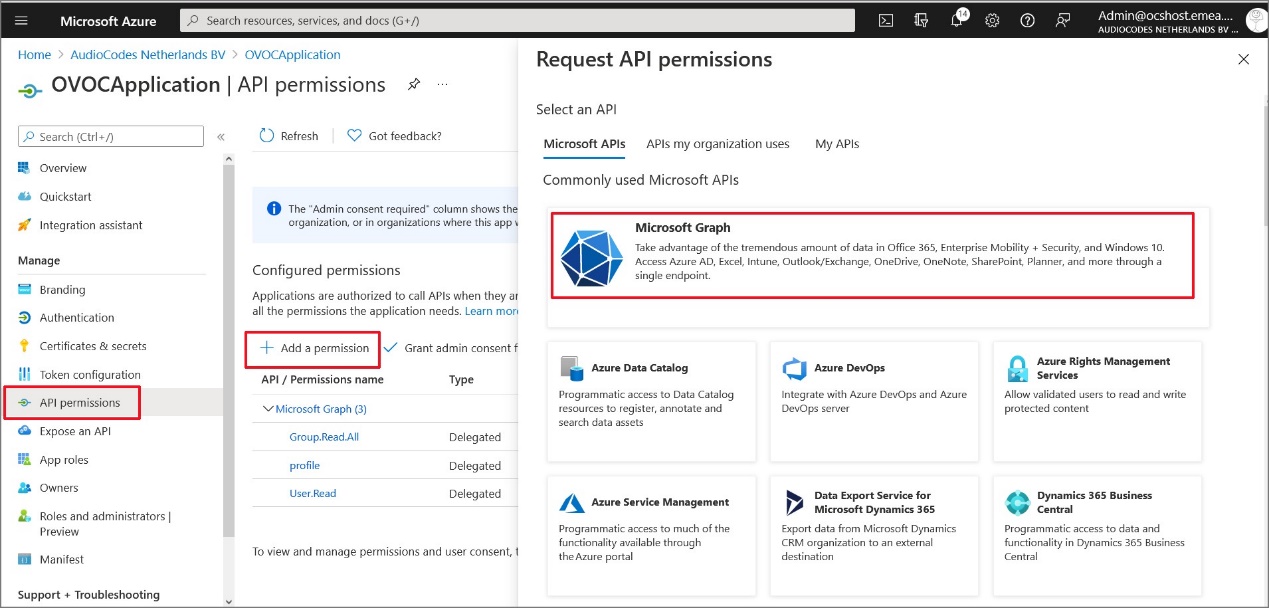
16.
|
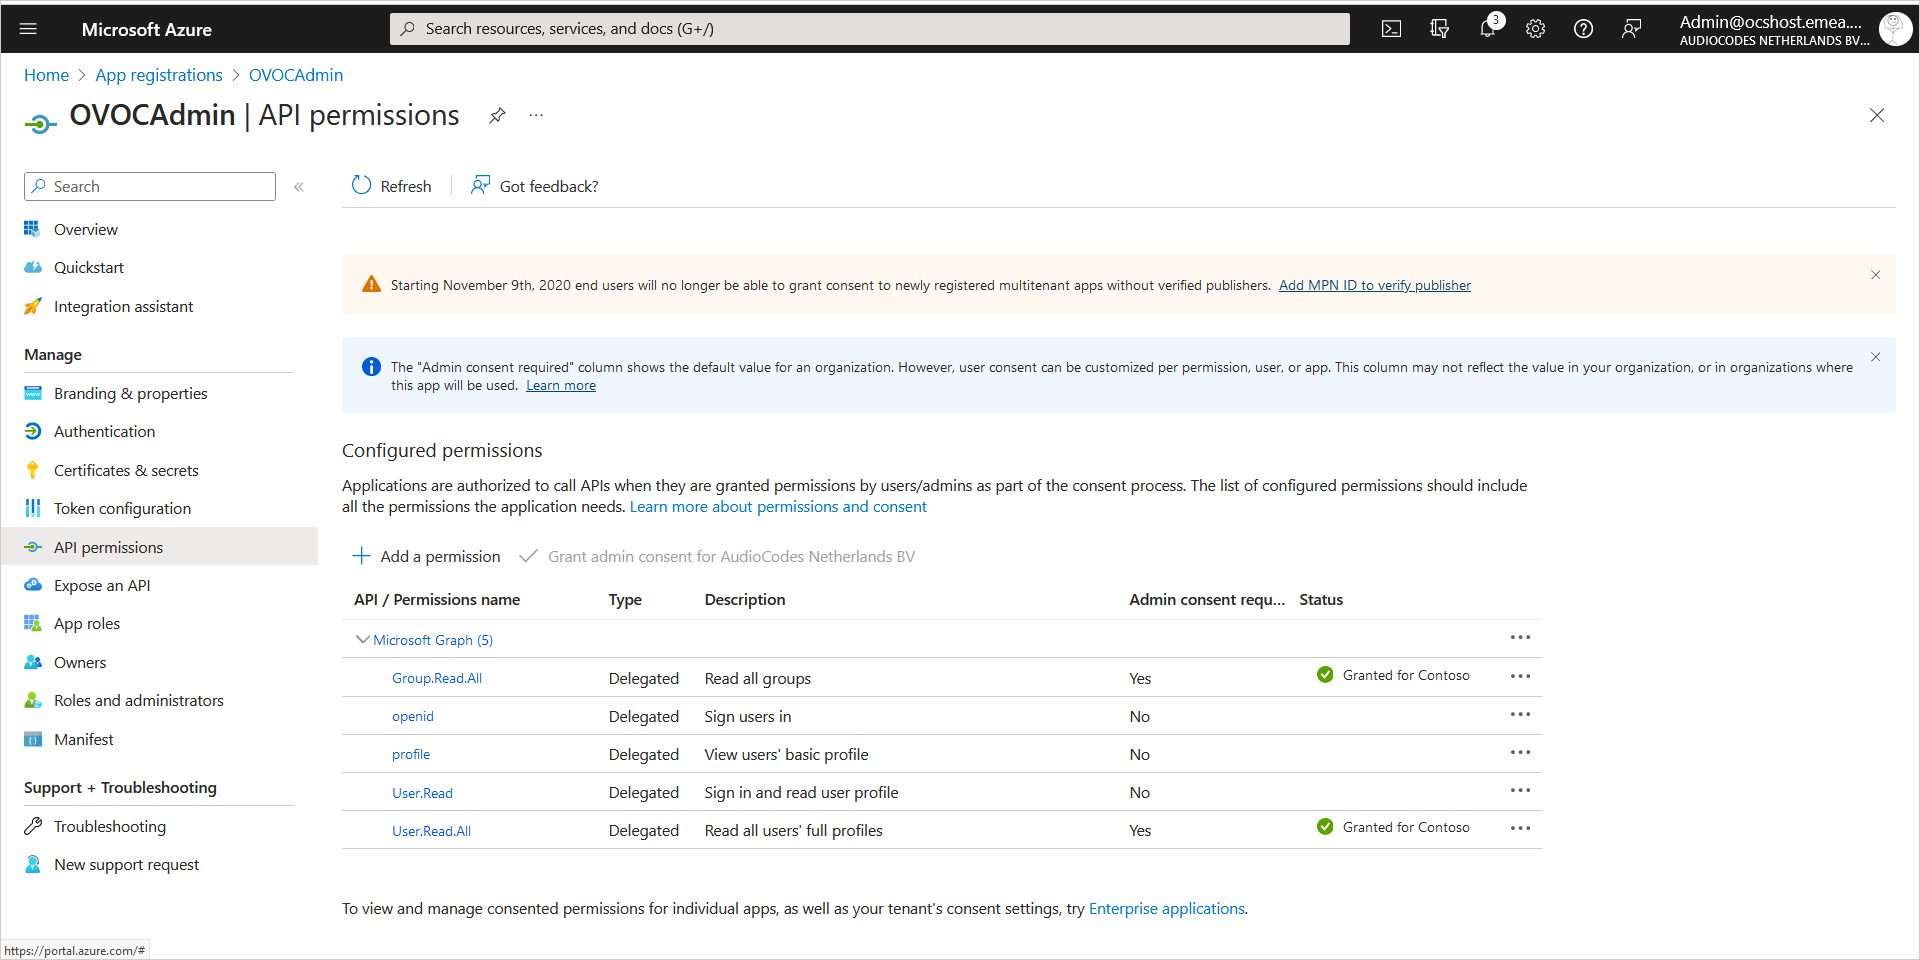
In the Navigation pane, select API permissions. |
|
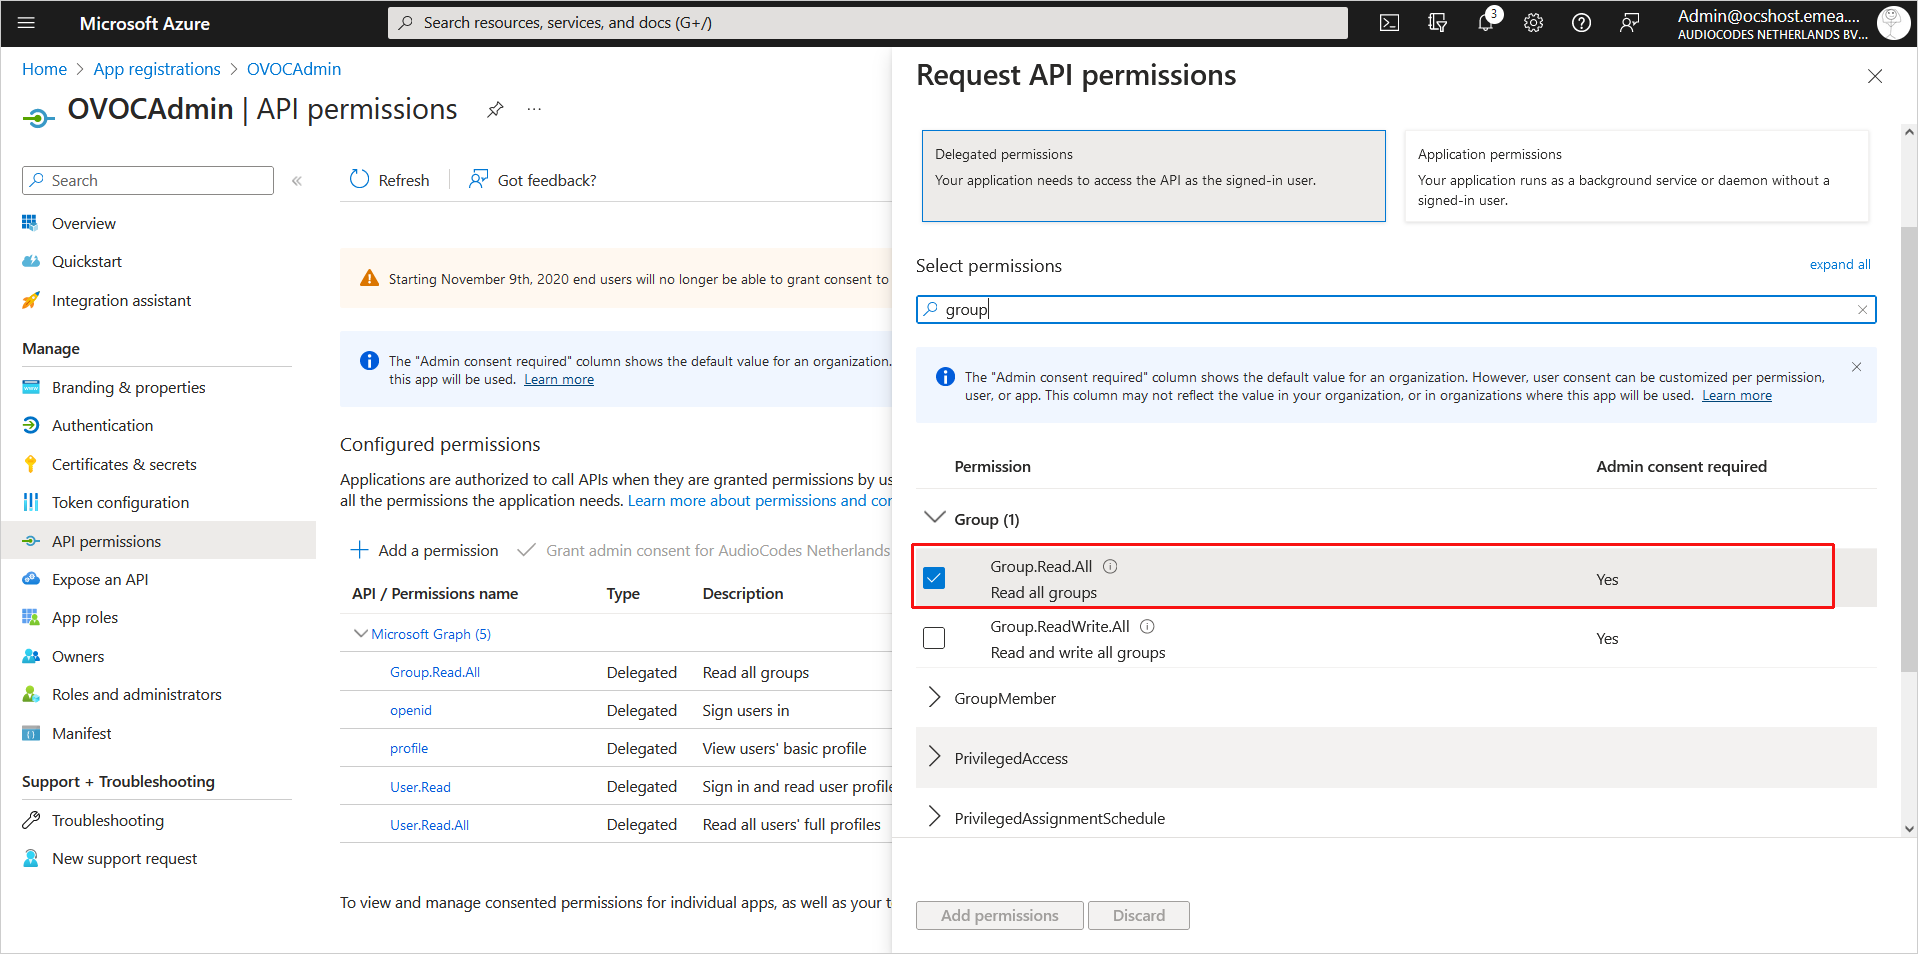
17.
|
Click Add a permission and then click the Microsoft Graph link. |
|
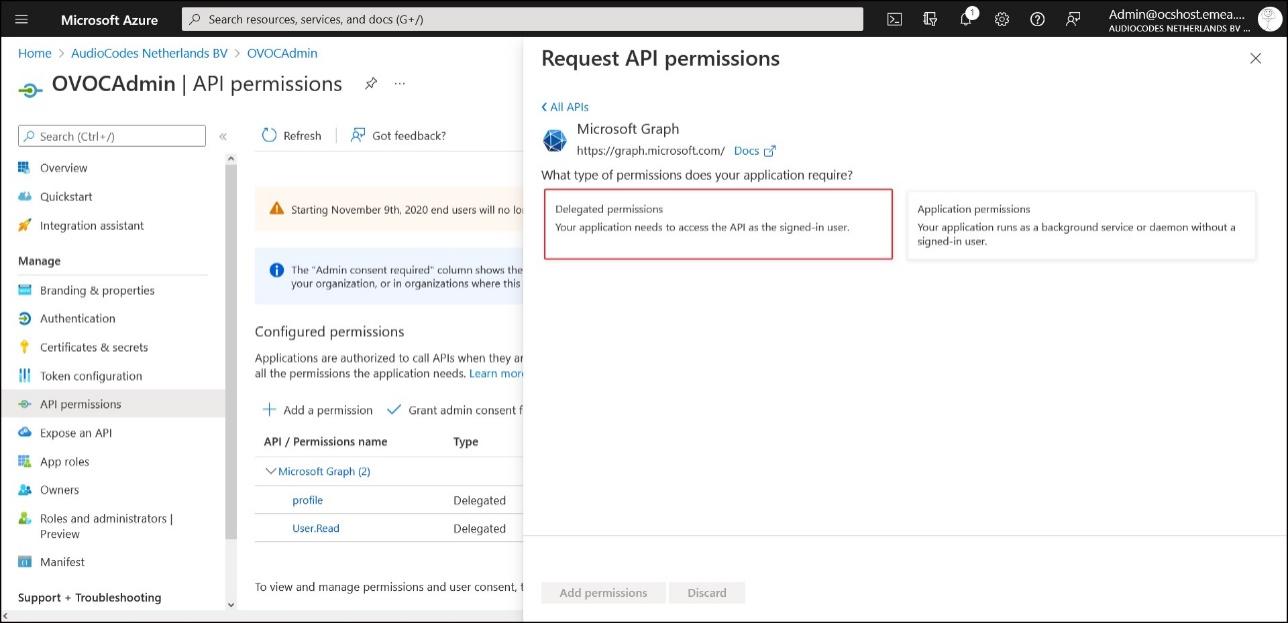
18.
|
Click Delegated permissions. |
|
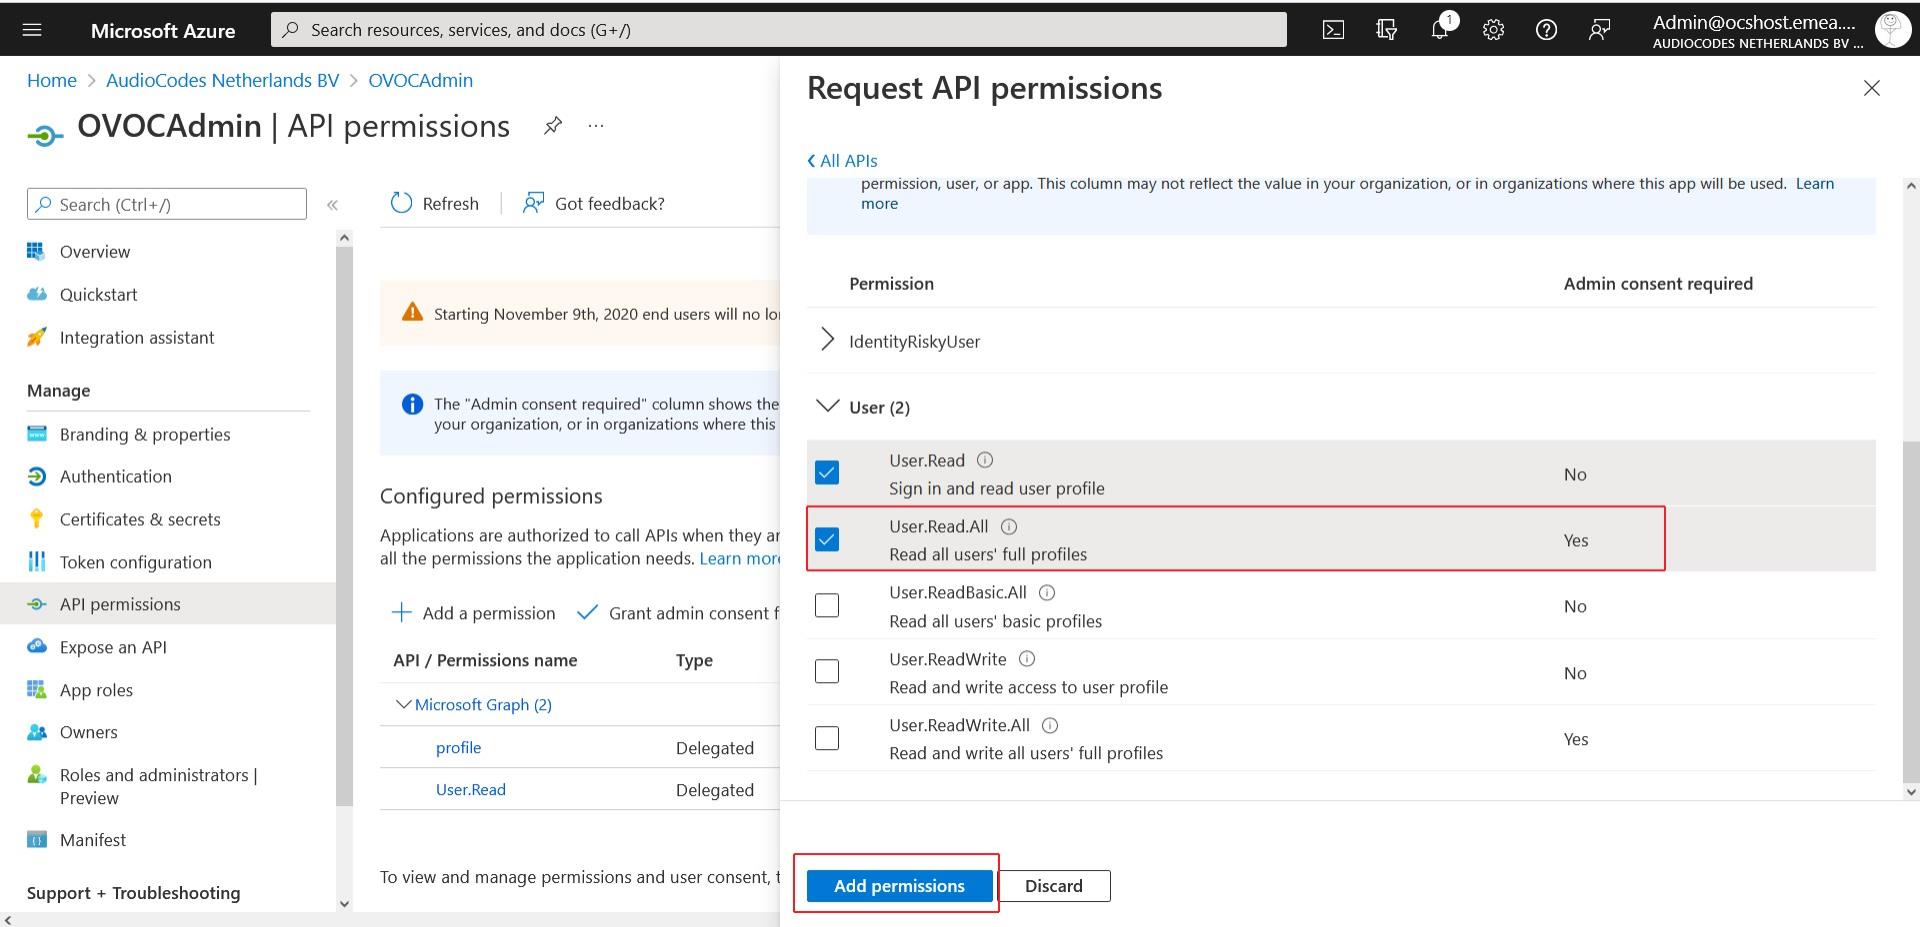
19.
|
Select permission User.Read.All and then click Add permissons. |
|
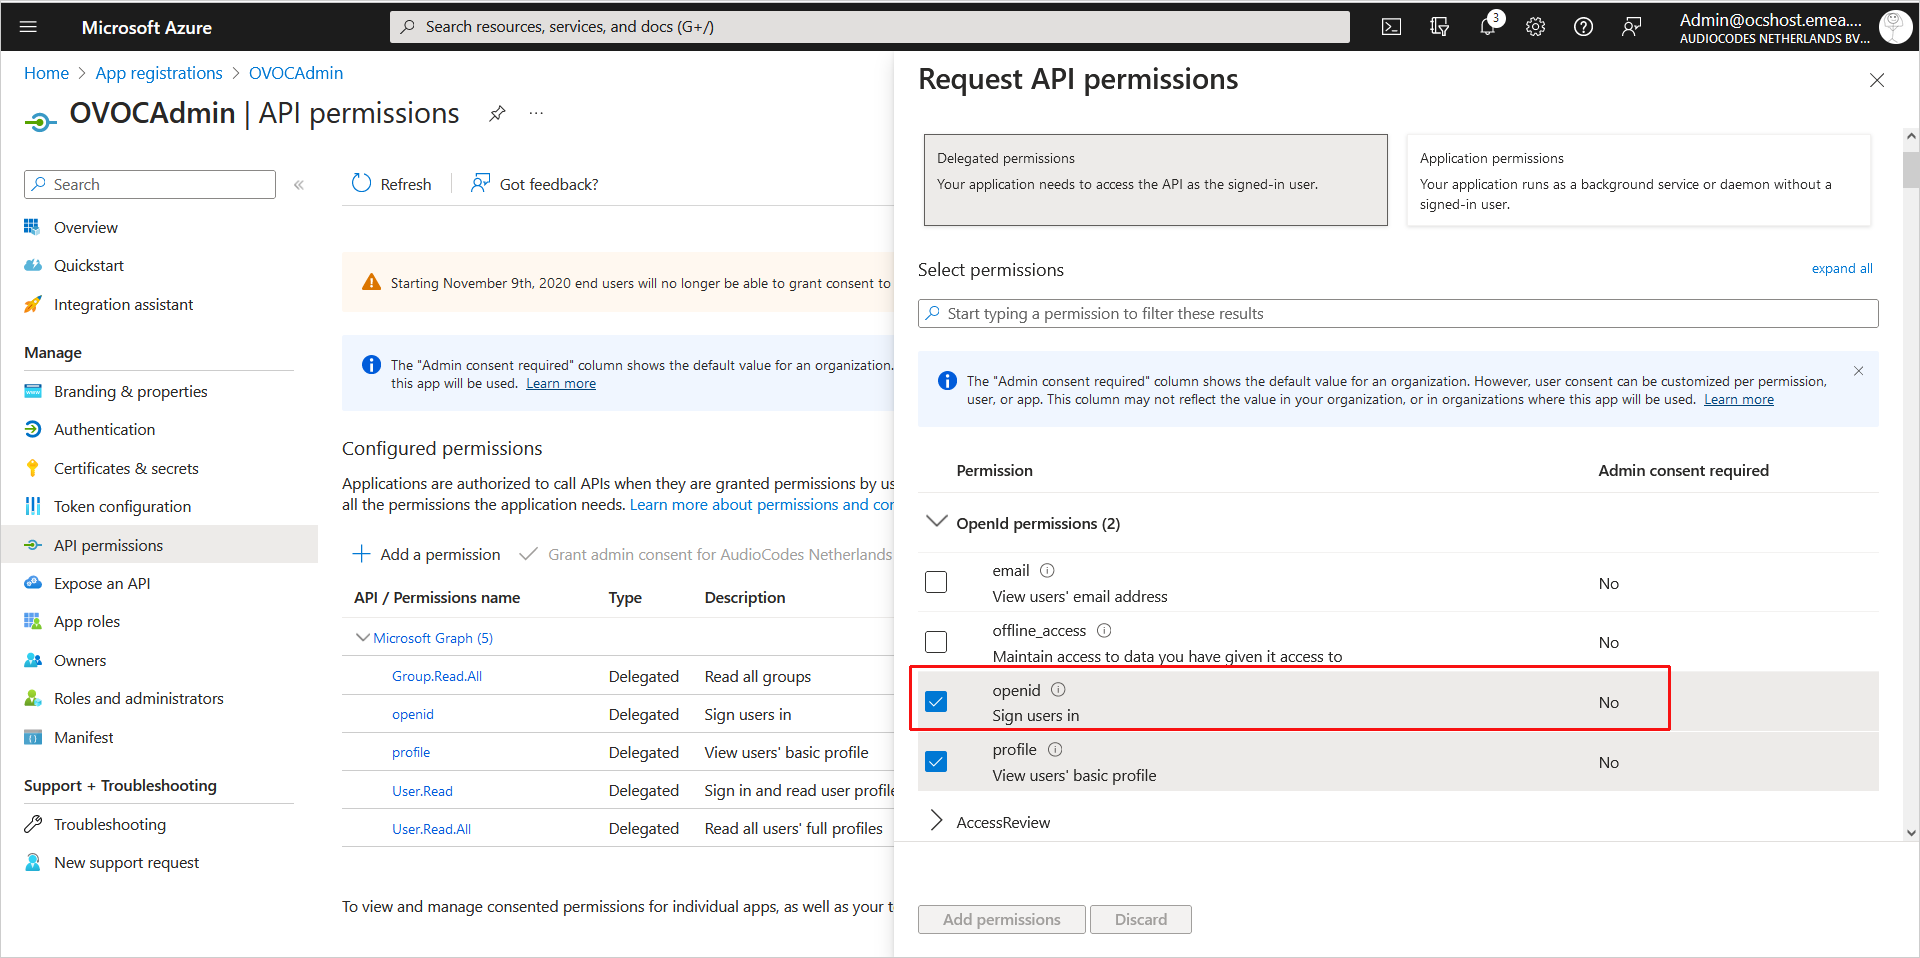
20.
|
Add permission openid. |
|
21.
|
Add permission Group.Read.All. |

|
22.
|
Click Grant admin consent for AudioCodes – SQA LIVE. |
The configured API permissions are displayed.
|
23.
|
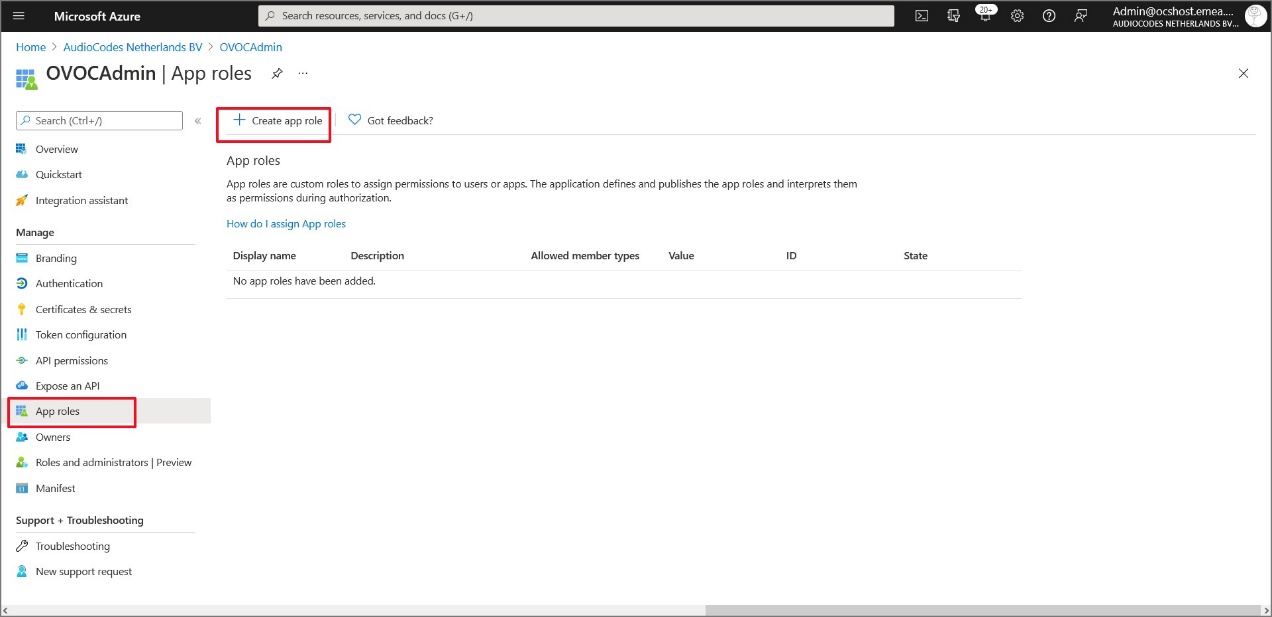
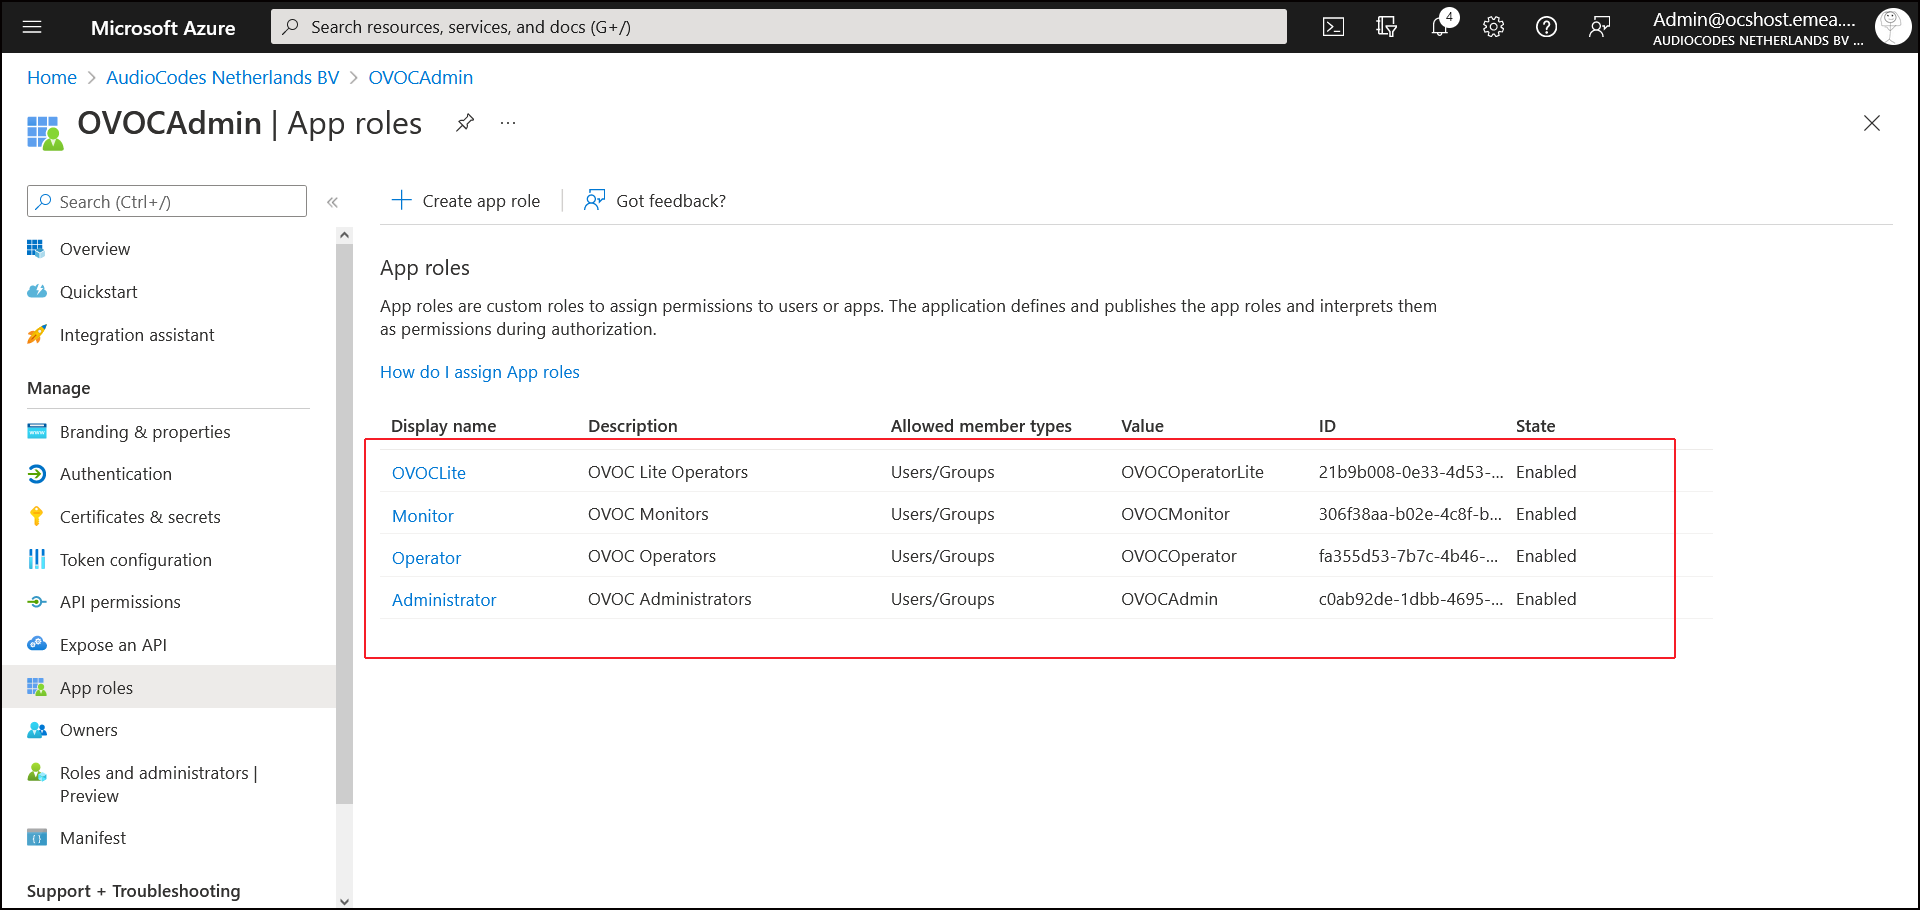
In the Navigation pane, select App roles. |
|
24.
|
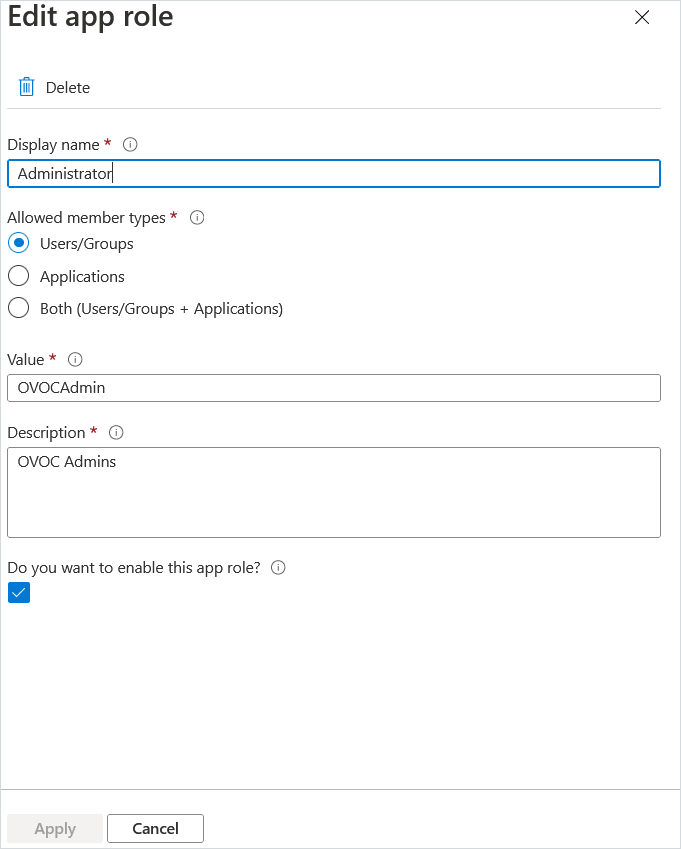
Create an app role with Admin permissions: |
|
●
|
In the Display Name field, enter Administrators or Admins |
|
●
|
Select Users/Groups check box |
|
●
|
Select the Do you want to enable this app role check box. |
|
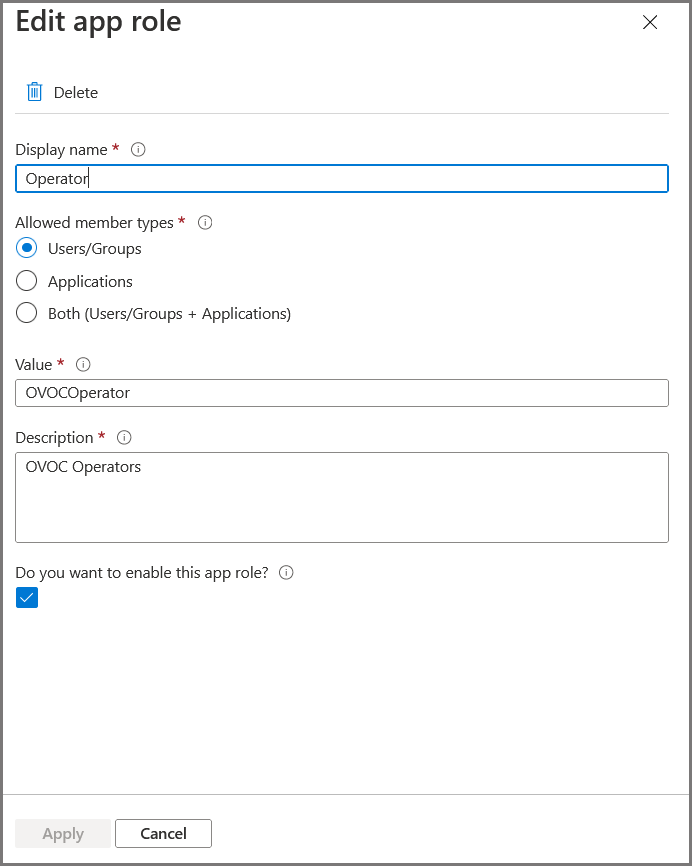
25.
|
Repeat the above steps to create an App role with Operator permissions with value OVOCOperator. |
|
26.
|
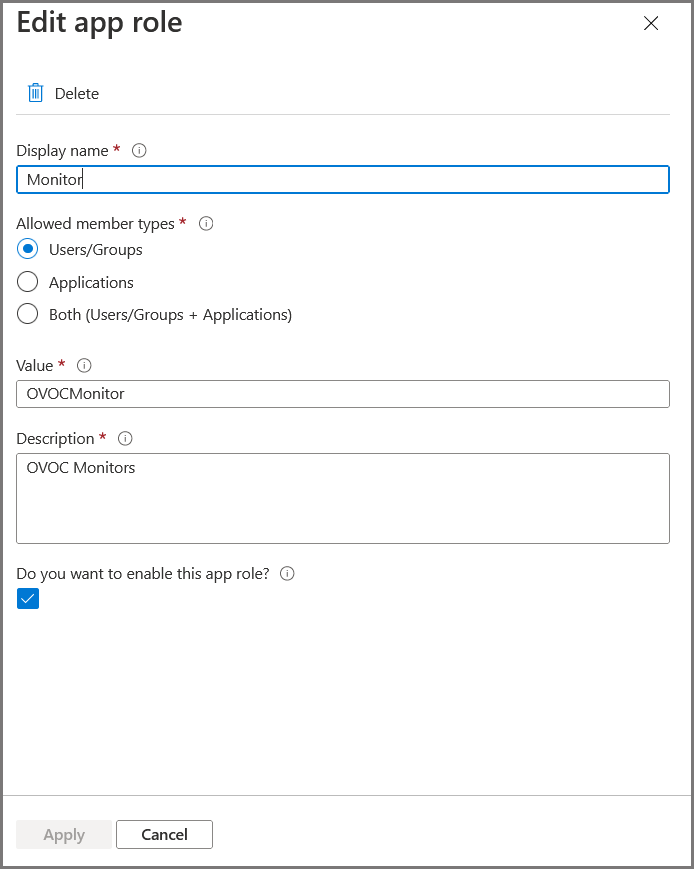
Repeat the steps described for adding Admin role above to create an app role with Monitor permissions with value OVOCMonitor. |
|
27.
|
Repeat the steps described for adding Admin role above to create an app role with Monitor permissions with value OVOCOperatorLite. |

The new roles are displayed:
|
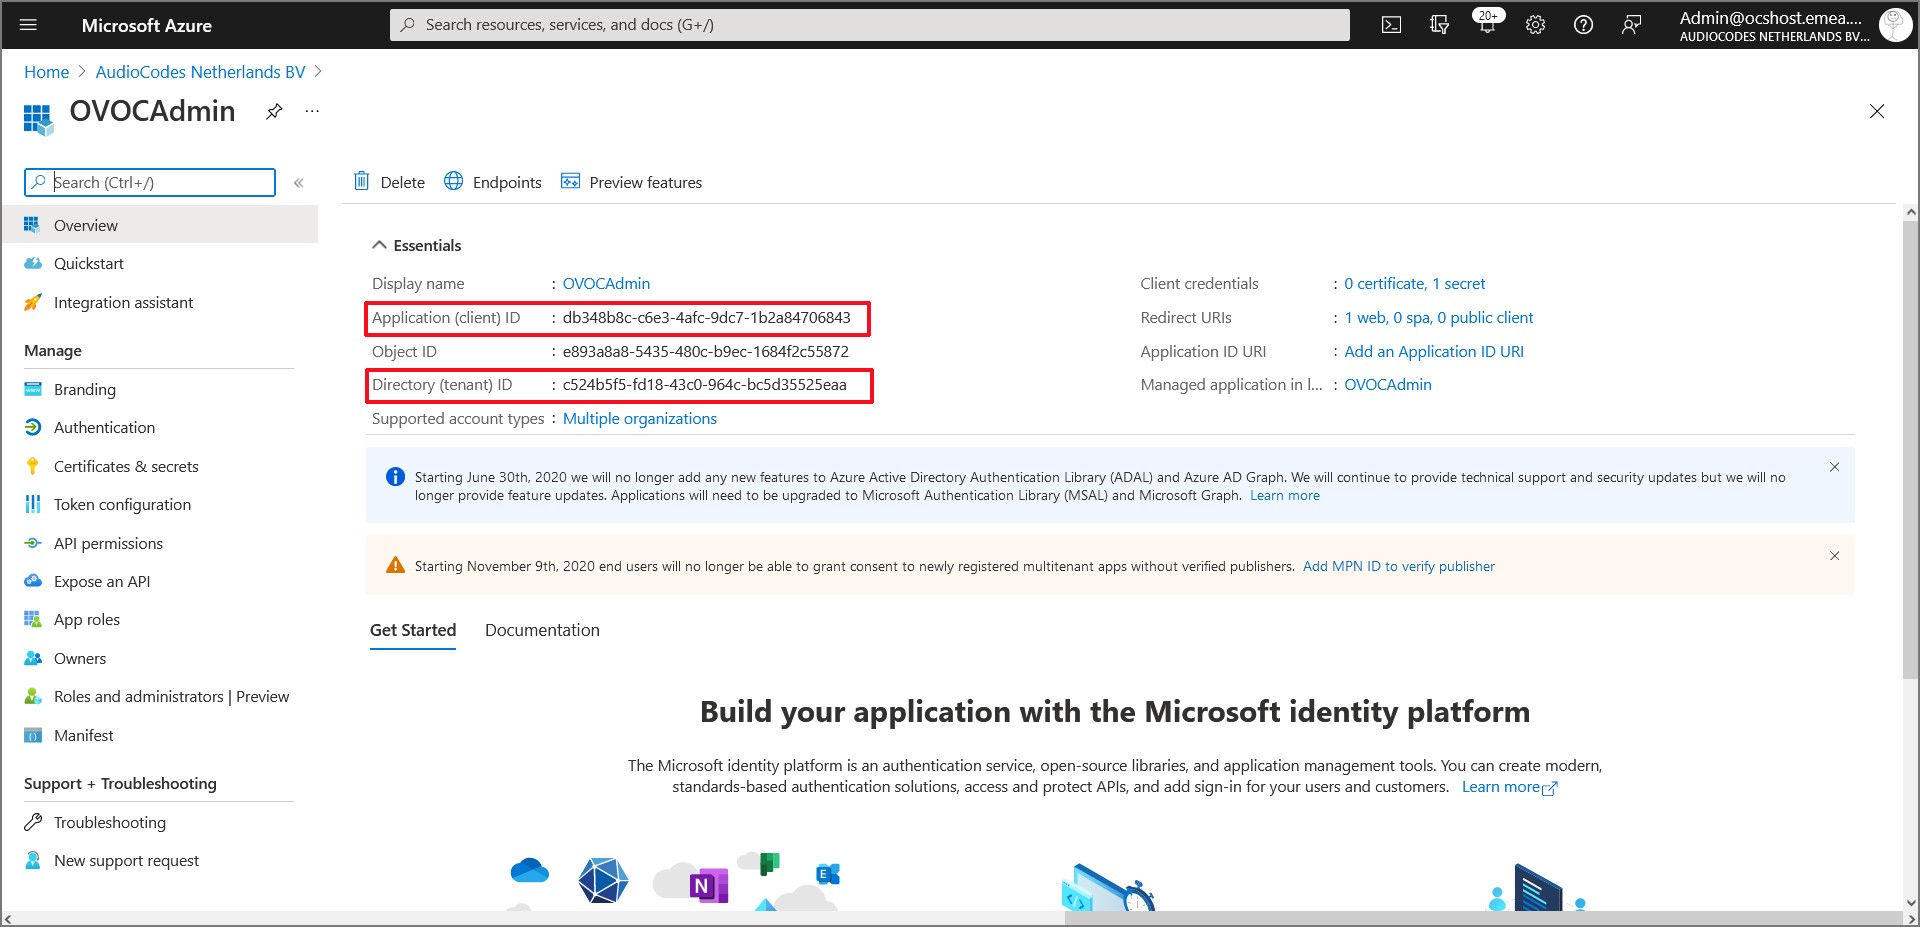
28.
|
In the Navigation pane, select the Overview page for the application. |